 |
| All items available at ModCloth |

Showing posts with label October. Show all posts
Showing posts with label October. Show all posts
Sunday, October 12, 2014
Wednesday, September 24, 2014
Orb of hatching spiders

You will need:
White glue
2 bowls
Plastic spoon
Balloon (I used 11 inch size)
Cheesecloth cut into 12 to 16 strips (3 x 18 inch)
Pin
Clear fishing line
Plastic spiders (I used 16 but wish I had bought more)
White glue
2 bowls
Plastic spoon
Balloon (I used 11 inch size)
Cheesecloth cut into 12 to 16 strips (3 x 18 inch)
Pin
Clear fishing line
Plastic spiders (I used 16 but wish I had bought more)

Empty the glue bottle into a bowl. Fill the bottle halfway with water, shake it to dilute any remaining glue, and add the contents to the bowl. Stir mixture well.

Inflate the balloon and set it aside in the other bowl.

Individually dip the cheesecloth strips into the glue, gently squeezing out the excess fluid.

Spread the strips flat on the balloon. Cover the balloon this way, leaving 3 or 4 small gaps and a 1.5" opening around the knot for tying the spiders on later.


Let dry. I left mine to dry overnight.

Pop the balloon with a pin and remove it.

Tie a loop for hanging the egg at one end of a long piece of fishing line. Near the top of the egg, insert the other end of the line through the cheesecloth, then reach inside and pull it out through a nearby gap and tie a spider to it. Gently pull the line back until the spider comes to rest against the egg, thereby securing the line.

Use more fishing line to create strings f spiders. To tie them to the egg, thread one end of the line through the cheesecloth and out a gap, knot the line, and pull the knot back inside the egg. You can also attach more spiders directly to the egg simply by poking 2 or 3 legs through the cheesecloth.

Here is our finished product!

Monday, September 22, 2014
More Halloween creepiness around the house
 |
| Floating Witch hats |
 |
| Vengeful bride |
 |
| Little Playmate |
 |
| Dolores |
 |
| My rat familia |
 |
| Little Evie - She may look sweet..... |
 |
| Even the greenery gets the treatment |
 |
| Collection of oddities |
Friday, September 19, 2014
Snakes on a Wreath
This is a super simple project that has a lot of impact. I love the way it turned out!
 |
| You will need rubber snakes (I used four but if you are using a larger wreath, you will want more) Black spray paint Grapevine wreath Floral wire Wire cutters |
 |
| Spray paint the snakes black. |
 |
| Spray paint the wreath black. |
 |
| Affix snakes to wreath using the floral wire and hang. |
You could fancy this up even more by using black ribbon or tulle, spiders, whatever. Looks pretty cool as is though :)
Sunday, September 14, 2014
Prep time
Some Fall and Halloween prep around the Scott house.....in pictures.
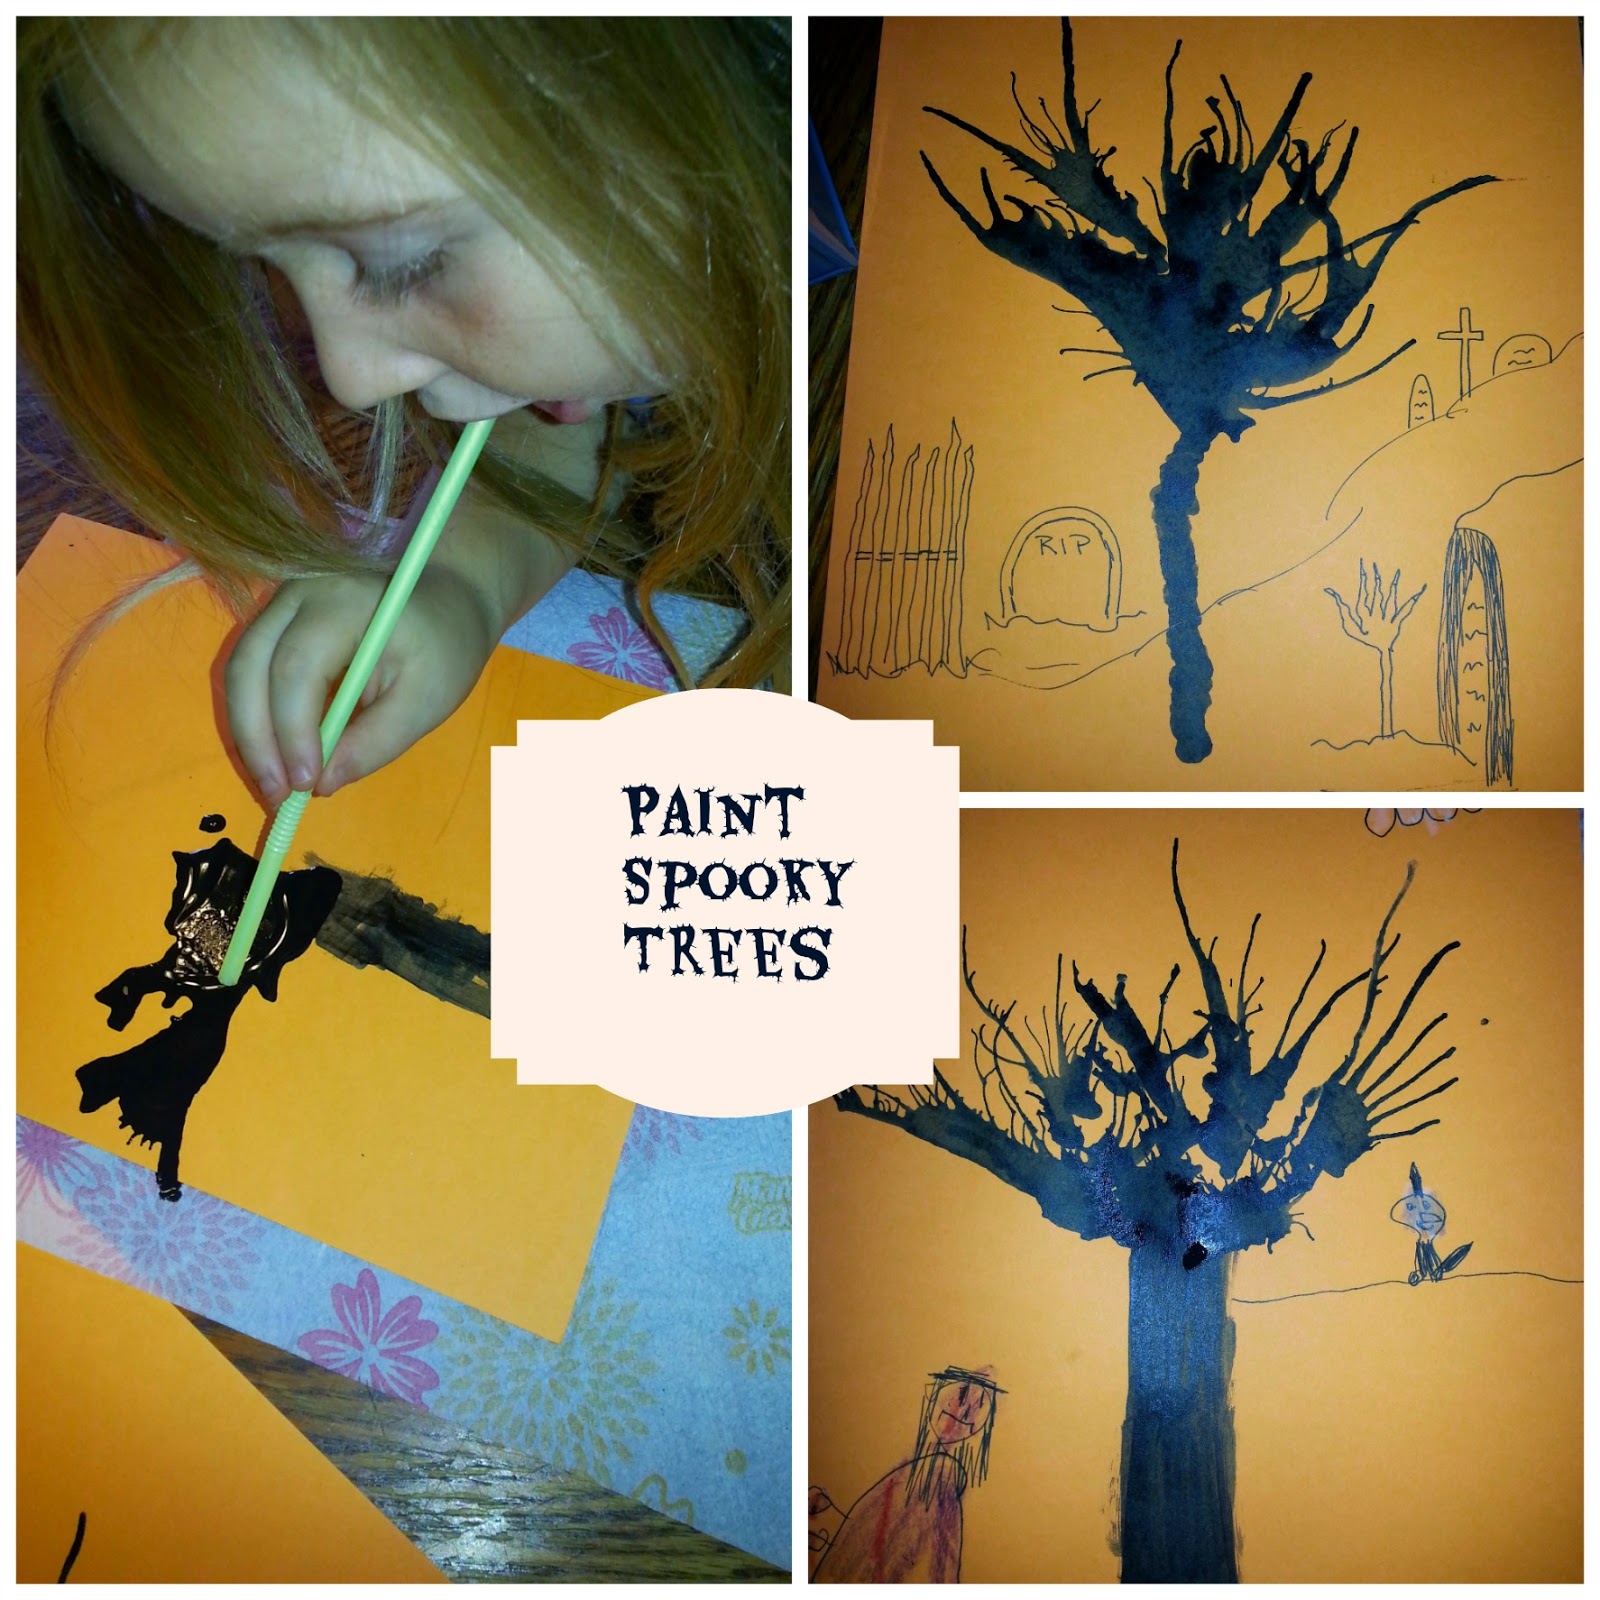
Painted some spooky trees using watered down black paint, a straw, and breath!

Spray painted some branches black

Took a walk around the stores and looked at all of the awesome Halloween decor.

Got out some of my Halloween decorations because I couldn't wait any longer!

Put Ms. Watkins on the door and admired her life-like hair....um. oh. Surely not.

Cut mice out of black construction paper and taped to stairs. This looks so real in candlelight.
This is as far as I got today. I was hoping the hubby wouldn't notice that I had decorated just an eentsy bit but he did. Must have been the gargantuan tarantula climbing the stairs. I am doing quadruple Halloween decorating duty this year. I have the house, the library Halloween Carn-evil, the annual Bonfire and maybe (fingers crossed) another little shindig in the works ;)
I think a little head start to the season is called for!
I think a little head start to the season is called for!
Wednesday, October 30, 2013
Funny Bones
Perfect mix of sweet and salty!
You will need:
1 (12 ounce) package of white chocolate chips
36 pretzel sticks of various sizes
72 mini marshmallows (about 1 cup)

1. Place the white chips in a double boiler over simmering water and melt, stirring frequently. As soon as they are done melting, remove the pan from the heat.


2. Stick marshmallows onto both ends of the pretzels, with the marshmallows' flat sides parallel to the pretzel.

3. Dip each pretzel in the chocolate and lift out with a fork, letting the excess drip back in the bowl.


4. Lay the bones on a baking sheet and refrigerate for 30 minutes. Store in an airtight container.

5. Bones look best when stacked together on a plate.

Monday, October 28, 2013
Yummy Mummy

For this project you will need a toilet paper tube, gauze, tape, a piece of white paper, googly eyes (or something that can be used as eyes) and candy.

Start by tracing two circles on a white piece of paper. cut the circles just inside the traced line so it will fit inside of the tube.

Cut the toilet paper tube in half.

Tape the white circles inside of each half of the tube.

Cut off a length of gauze. Make it long enough that it will wrap around the tube several times. Tape one end to the tube and start wrapping, overlapping as needed to create dimension.

Tuck in the other end of the gauze or tape it down.

Add googly eyes. I could not find any so I used foam stickies. Googly eyes would look better, I think.

Stuff with candy! These would make cute classroom treats.
Only a few more days left in October. I am loving the cooler temps and snuggling down with my favorite blanket to watch Dexter and Walking Dead. Soon, we will all be Christmas shopping and baking treats for the holidays. I am looking forward to all of it but somewhere, deep in the recesses of my subconscious, I am already yearning for January and the slow, quiet nature of winter and just being.
Wednesday, October 16, 2013
Zombie Shooter
If Darryl were to walk in on a Zombie bash, I am pretty sure this is what they would be serving at the bar.
It looks like a bloody brain and has the mouthfeel of curdled milk but it doesn't taste all that bad.
I didn't have shot glasses so I made this in a large wineglass. I am sure the presentation would be ten times better if you used the correct glass.
You will need:
- 1 ounce of peach schnapps
- 1 teaspoon of Bailey's Irish Cream
- Grenadine
- Shot glass (clear glass is essential for maximum eww factor)

1. Pour the peach schnapps into a shot (or clear) glass.
2. Float the Bailey's Irish Cream on top of the schnapps.
3. Dribble a few drops of grenadine on top of the Bailey's. Take it nice and slow. You want the "blood" to seep into the brain crevasses.
4. Make zombie-like noises and drink up.


 |
| Looks like this brain was slightly scrambled. |
Subscribe to:
Posts (Atom)